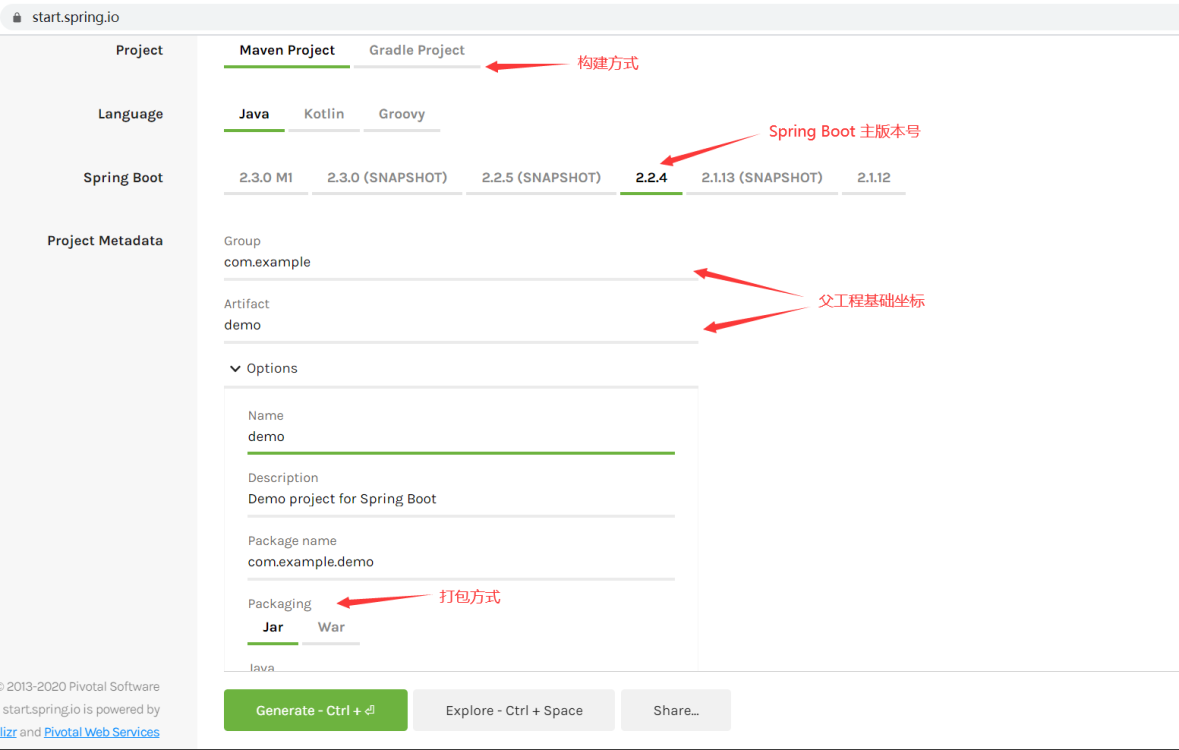
搭建一个Spring Boot脚手架工程 1.创建工程 Spring Boot基础工程可由Spring Initializer 构建生成.
填写好Project的一些基本信息,外加一些必要的依赖,直接Generate即可. 这里创建的是一个Spring Web工程.
2.集成Web框架 将项目导入到IDE之后,编写一点代码测试运行是否正常.
2.1 新增配置 编辑applicaiton.properties文件
1
2
3
4
#指定内置服务器端口 server.port=8080 spring.thymeleaf.prefix=classpath:/templates/ spring.thymeleaf.suffix=.html
2.2 编写测试代码 再新增两个Controller测试类,分别测试跳转页面和返回字符串两种情况.代码如下:
1
2
3
4
5
6
7
8
9
10
11
12
13
14
import org.springframework.stereotype.Controller; import org.springframework.ui.Model; import org.springframework.web.bind.annotation.RequestMapping; @Controller @RequestMapping("/hello") public class HelloController { @RequestMapping("/test") public String test(Model model) { model.addAttribute("kobe", "Kobe Bryant"); return "hello"; } }
返回一个名为hello的模板视图.
1
2
3
4
5
6
7
8
9
10
11
<!DOCTYPE html> <html lang="en" xmlns:th="http://www.w3.org/1999/html"> <head> <meta charset="UTF-8"> <title>See you Kobe</title> </head> <body> <h1>Mamba Out</h1> <h1 th:text="${kobe}"></h1> </body> </html>
保存并运行,访问localhost:8080/hello/test
再编写一个测试直接返回字符串,代码如下:
1
2
3
4
5
6
7
8
9
10
11
12
import org.springframework.web.bind.annotation.RequestMapping; import org.springframework.web.bind.annotation.RestController; @RestController @RequestMapping("/demo") public class DemoController { @RequestMapping("/test") public String test() { return "demo is running"; } }
3.集成Mybatis框架 父工程的POM文件中加入mybatis的Spring Boot Starter依赖和Druid数据源,Mysql驱动的Maven坐标:
3.1 添加依赖 1 2 3 4 5 6 7 8 9 10 11 12 13 14 15 16 <dependency> <groupId>org.mybatis.spring.boot</groupId> <artifactId>mybatis-spring-boot-starter</artifactId> <version>2.1.1</version> </dependency> <dependency> <groupId>mysql</groupId> <artifactId>mysql-connector-java</artifactId> </dependency> <dependency> <groupId>com.alibaba</groupId> <artifactId>druid</artifactId> <version>1.0.5</version> </dependency>
3.2 修改配置 application.properties配置文件中,加入关于Mybatis和Druid数据源的相关配置.
1 2 3 4 5 6 7 8 9 10 11 12 13 14 15 16 17 18 19 20 21 22 23 24 25 26 # mybatis mybatis.type-aliases-package=me.chan.domain mybatis.type-handlers-package=me.chan.typehandler mybatis.configuration.default-fetch-size=100 mybatis.configuration.default-statement-timeout=3000 mybatis.mapper-locations=classpath:/mapper/**/*.xml # datasource spring.datasource.url=jdbc:mysql://192.168.1.100:3306/flash_sale?useUnicode=true&characterEncoding=utf-8&allowMultiQueries=true&useSSL=false spring.datasource.username=root spring.datasource.password=123456 spring.datasource.driver-class-name=com.mysql.jdbc.Driver spring.datasource.type=com.alibaba.druid.pool.DruidDataSource spring.datasource.filters=stat spring.datasource.maxActive=1000 spring.datasource.initialSize=100 spring.datasource.maxWait=60000 spring.datasource.minIdle=500 spring.datasource.timeBetweenEvictionRunsMillis=60000 spring.datasource.minEvictableIdleTimeMillis=300000 spring.datasource.validationQuery=select 1 spring.datasource.testWhileIdle=true spring.datasource.testOnBorrow=false spring.datasource.testOnReturn=false spring.datasource.poolPreparedStatements=true spring.datasource.maxOpenPreparedStatements=20
3.3 编写用例 新建一个User表并插入一条数据,写点代码测试框架集成是否能正常运行
1
2
3
4
5
6
7
create table user ( id int not null primary key, name varchar(20) ); INSERT INTO user (id, name) VALUES (1, "xiaoming");
UserDao类:
1
2
3
4
5
6
@Mapper public interface UserDao { @Select("SELECT * FROM user WHERE id = #{id}") User getById(@Param("id") Integer id); }
UserService的实现类:
1
2
3
4
5
6
7
8
9
10
11
@Service("userService") public class UserServiceImpl implements UserService { @Autowired UserDao userDao; @Override public User getById(Integer id) { return userDao.getById(id); } }
Controller类:
1
2
3
4
5
@GetMapping("/user/{id}") public Result testQuery(@PathVariable("id") Integer id) { User user = userService.getById(id); return Result.success(user); }
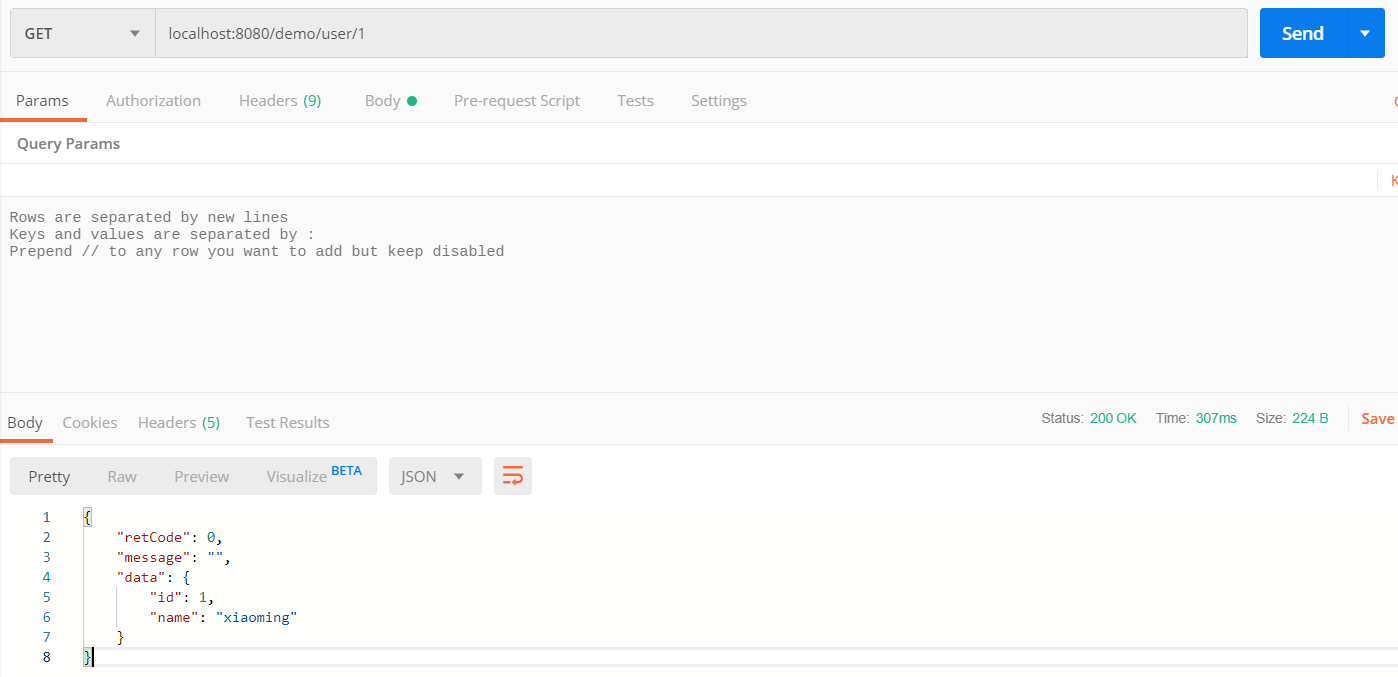
用Postman作为测试工具来发送http请求:
集成Mybatis工作完成.
4. 集成Redis 现代应用中对缓存的使用往往是必不可少的,而Redis又是业界使用最广泛和最成熟的缓存中间件,因此我们也使用Redis.
4.1 引入spring-boot-data-redis依赖 POM文件中添加:
1
2
3
4
5
6
7
8
9
10
11
12
13
14
15
16
17
<dependency> <groupId>org.springframework.boot</groupId> <artifactId>spring-boot-starter-data-redis</artifactId> <!--Spring Boot 2.0中spring-boot-starter-data-redis默认使用Lettuce方式替代了Jedis 如使用Jedis需排除lettuce模块 --> <exclusions> <exclusion> <groupId>io.lettuce</groupId> <artifactId>lettuce-core</artifactId> </exclusion> </exclusions> </dependency> <dependency> <groupId>redis.clients</groupId> <artifactId>jedis</artifactId> </dependency>
4.2 新增配置 在application.properties文件中新加入以下内容:
1
2
3
4
5
6
7
8
9
10
spring.redis.database=0 spring.redis.host=127.0.0.1 spring.redis.port=6379 spring.redis.password= ## millisecond spring.redis.timeout=60000 spring.redis.jedis.pool.max-active=8 spring.redis.jedis.pool.max-wait=3000 spring.redis.jedis.pool.max-idle=8 spring.redis.jedis.pool.min-idle=0
4.3 编写测试用例 新建一个RedisConfig类
1
2
3
4
5
6
7
8
9
10
11
12
13
14
15
16
17
18
19
20
21
22
23
24
@Configuration public class RedisConfig { @Bean public StringRedisTemplate stringTemplate(RedisConnectionFactory factory) { StringRedisTemplate stringRedisTemplate = new StringRedisTemplate(); stringRedisTemplate.setConnectionFactory(factory); return stringRedisTemplate; } @Bean public RedisTemplate<String, Object> redisTemplate(RedisConnectionFactory factory) { RedisTemplate<String, Object> redisTemplate = new RedisTemplate<>(); redisTemplate.setConnectionFactory(factory); redisTemplate.setDefaultSerializer(new StringRedisSerializer()); redisTemplate.setKeySerializer(new StringRedisSerializer()); // 若使用fastjson进行序列化,需引入fastjson的依赖 redisTemplate.setValueSerializer(new FastJsonRedisSerializer<>(Object.class)); redisTemplate.afterPropertiesSet(); return redisTemplate; } }
对Redis的操作以服务接口的方式提供出来,新增一个RedisService类,代码如下:
1
2
3
4
5
6
7
8
9
10
11
12
13
14
15
16
17
@Service("redisService") public class RedisServiceImpl implements RedisService { @Autowired private RedisTemplate<String, Object> redisTemplate; @Override public void set(String key, Object value, long expirationTime, TimeUnit timeUnit) { redisTemplate.opsForValue().set(key, value, expirationTime); } @Override public Object get(String key) { return redisTemplate.opsForValue().get(key); } }
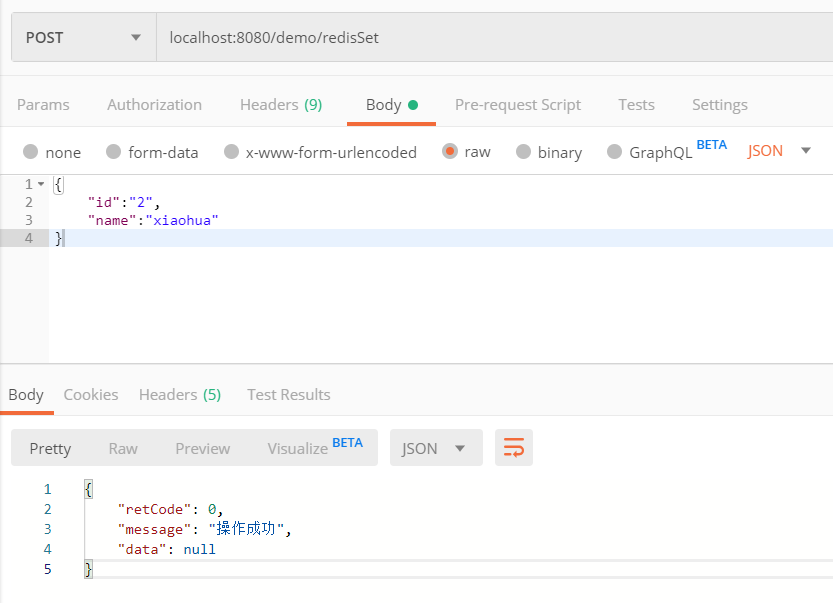
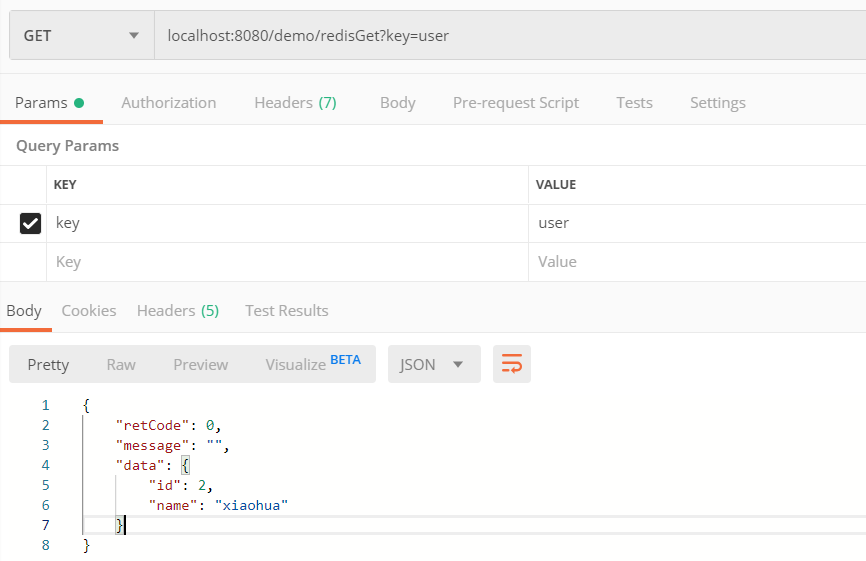
Controller类中新增两个方法,用于测试对Redis的set和get
1
2
3
4
5
6
7
8
9
10
11
12
13
14
@PostMapping("/redisSet") public Result testSet2Redis(@RequestBody User user) { String userJSON = JSONObject.toJSONString(user); redisService.set("user", userJSON, 5, TimeUnit.MINUTES); return Result.success(); } @GetMapping("/redisGet") public Result testGetFromRedis(@RequestParam("key") String key) { String obj = (String)redisService.get(key); User data = JSONObject.parseObject(obj, User.class); return Result.success(data); }
同样的,利用Postman测试


